Getting started with Jenkins: Agents
Apr 7, 2021 · 4 min readFollowing on from Getting started with Jenkins, this post will get a Jenkins Agent up and running your builds. Please make sure you have completed the instructions on the previous post.
We will run the Jenkins agents in docker containers, like we have for the controller.
We need to adjust the docker run command slightly this time around. But first, we need to define a Docker network. So let’s start with creating the Jenkins network.
docker network create jenkins
The above command will define a Docker network that both our containers (controller and agent) will run in.
We want to adjust the original docker run command to utilise the new network. Please run the following command to get the Jenkins controller up and running.
docker run --rm -p 8080:8080 --network jenkins -v "${HOME}/.jenkins:/var/jenkins_home" --name jenkins-controller jenkins/jenkins:lts
Now we have Jenkins running, let’s browse to http://localhost:8080, and follow the steps below:
- Click on Manage Jenkins on the left hand side.
- Under the System Configuration section, click on Manage Nodes and Clouds.
- On the left hand side, click on New Node.
- You can name this whatever you like.
- I’m going to call my agent smith.
- You will need to remember this for later.
- Click on the Permenant Agent radio box.
- Click OK.
Now we are going to configure the agent a little more. You can play around with different settings, but to keep us on the same page, please follow the steps below for now.
- For the Description field, please complete something descriptive so you know what it can be used for. Fow now, enter This is agent smith, which is really not descriptive!
- Leave the number of executors to 1.
- Executors define how many Jenkins Jobs an agent can run concurrently.
- The more CPU/Memory you give, the more concurrent jobs you can have running.
- Enter /home/jenkins/agent/ into the Remote root directory text field.
- The Label allows us to tie specific jobs to specific agents.
- For example, you may have Windows, Mac, and Linux agents, that run specific software, such as iOS builds.
- This can be used for defining those kinds of things.
- For now, this isn’t important to us, so we can leave this blank.
- Go ahead and click Save.
Once you have completed the above, and clicked Save you will be presented with the agent list. As you can see, smith is listed.
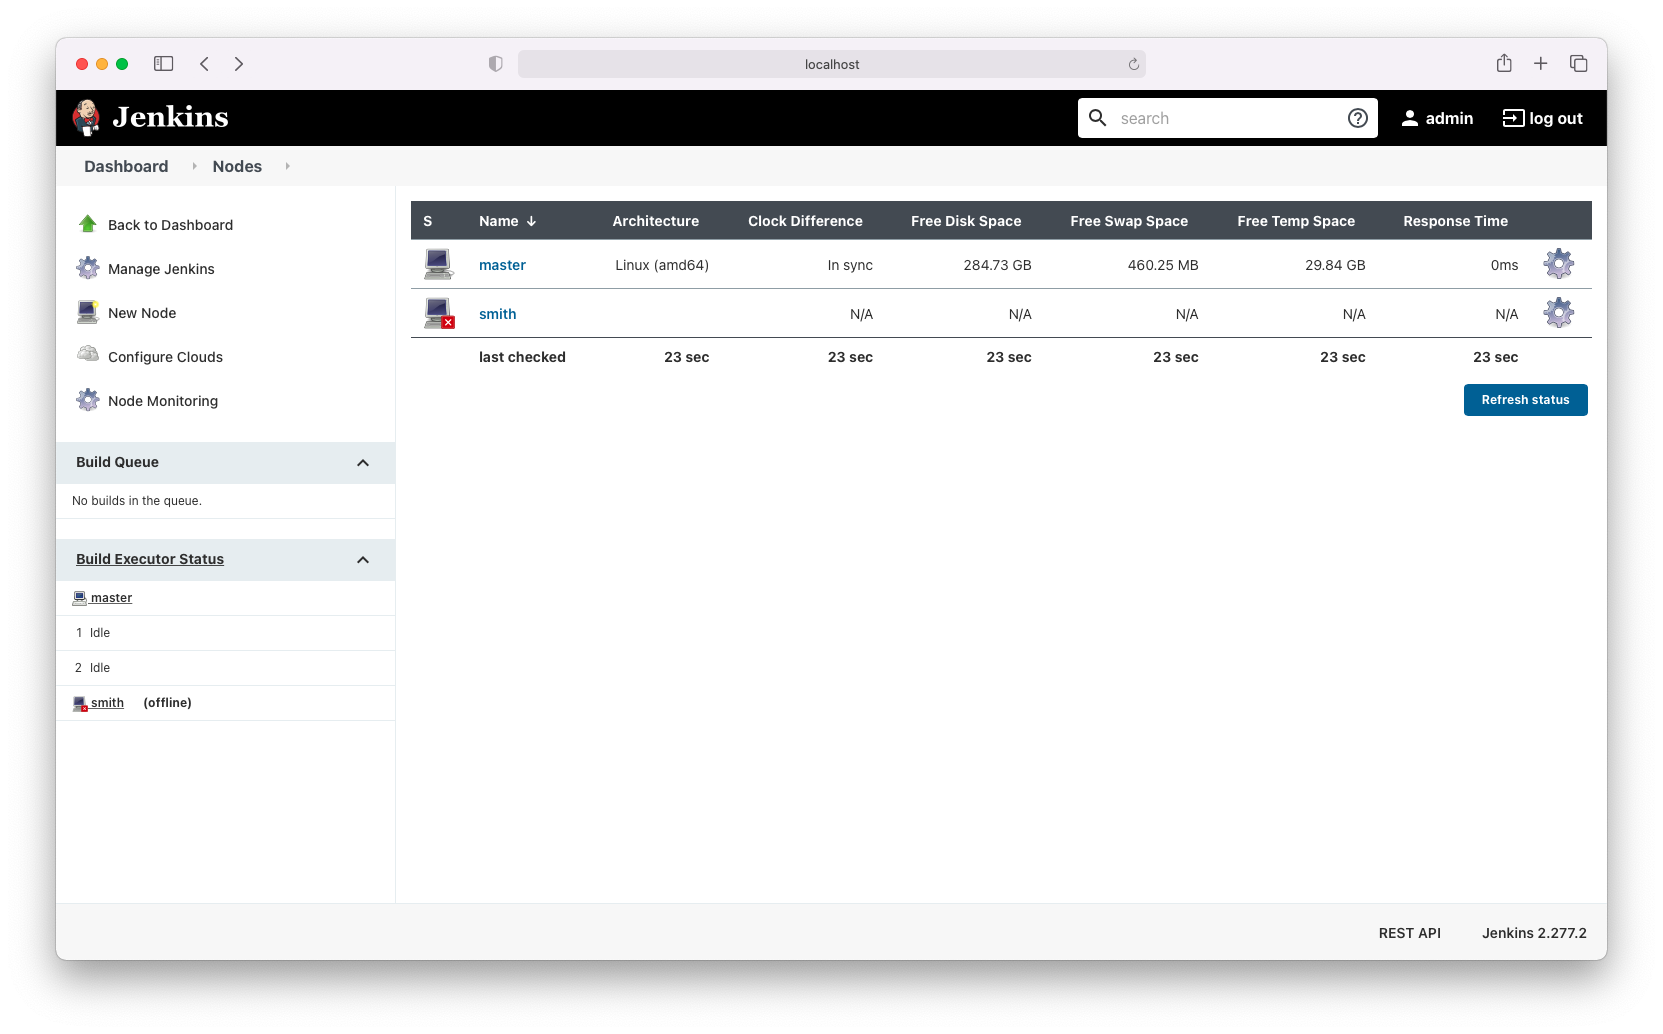
Click on smith, so we can see the connection details.
You should be able to see some text such as this:
java -jar agent.jar -jnlpUrl http://localhost:8080/computer/smith/jenkins-agent.jnlp -secret 91af70f19b975b97eef81d42f624f1c44bl1d216b380905c9c27531d2259d823 -workDir "/home/jenkins/agent/"
Copy the value from the -secret option. In this case, it is 91af70f19b975b97eef81d42f624f1c44bl1d216b380905c9c27531d2259d823, but your secret will be different.
In a terminal, now run the following command, replacing
<secret-from-above>to your secret.<agent-name-from-above>to your agent name.
docker run --rm \
 -eJENKINS_SECRET=<secret-from-above> \
 -eJENKINS_URL=http://jenkins-controller:8080 \
 -eJENKINS_AGENT_NAME=<agent-name-from-above> \
 --network jenkins \
 --init \
 -it \
 jenkins/inbound-agent:4.7-1
This will pull the jenkins/inbound-agent image down to your machine and then start to run it. All the different types of agent can be found on Docker Hub.
The URL may look a little odd here. The jenkins-controller part is the name of the container running your Jenkins Controller. This is important due to us running both containers inside a network.
There should be no errors whilst running the above command, so now let’s go back to Jenkins in the browser. You should now see smith as an agent on the left hand side.
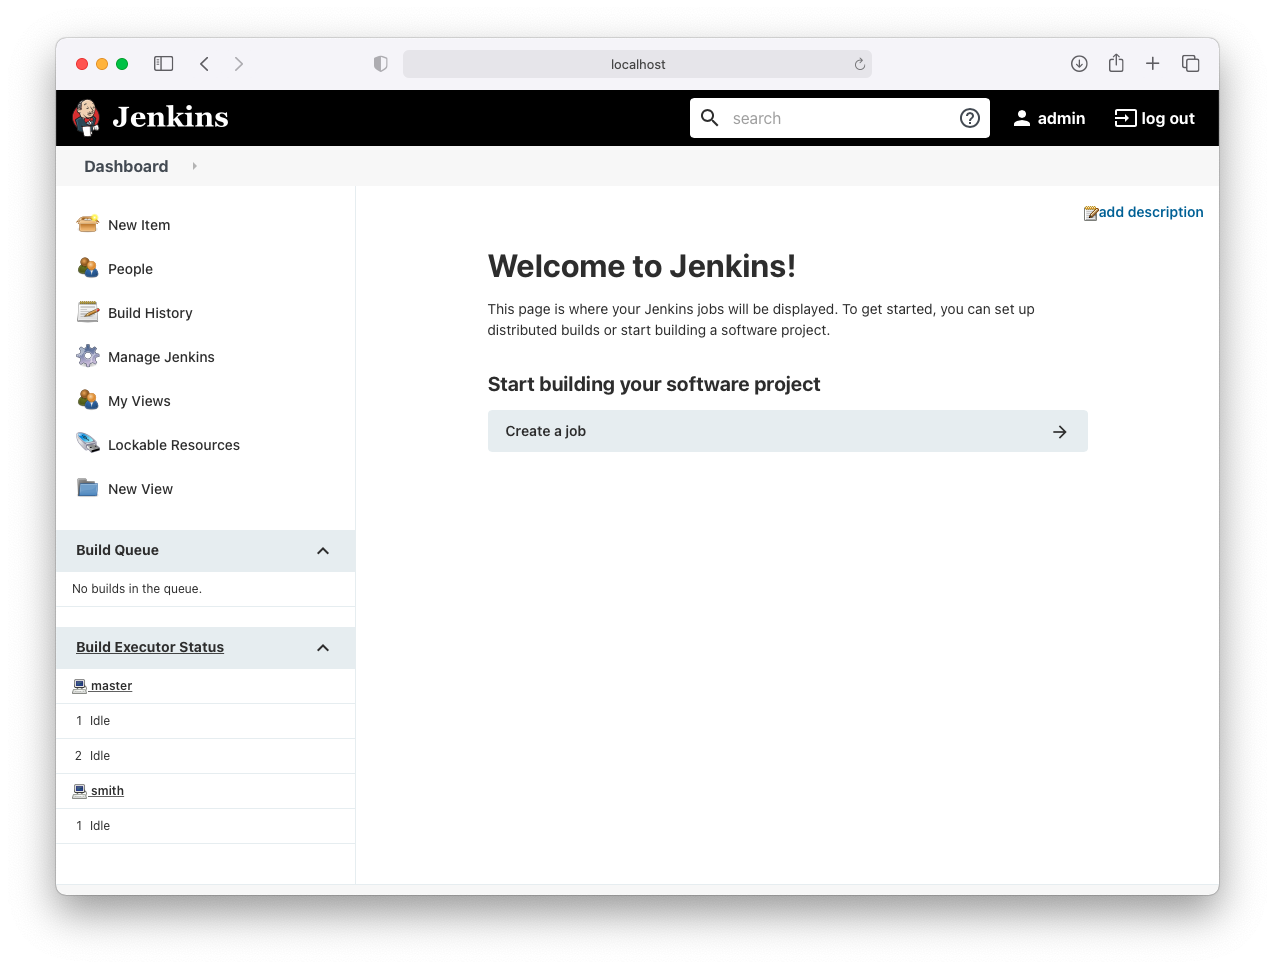
As you can see, we now have two build executors: master and smith. We don’t want to run any builds on the controller container (master), so let’s go ahead and stop that from happening.
- Click on Manage Jenkins on the left hand side.
- Under the System Configuration section, click on Configure System.
- Scroll to # of executors and change the value from 2 to 0.
- Click Save.
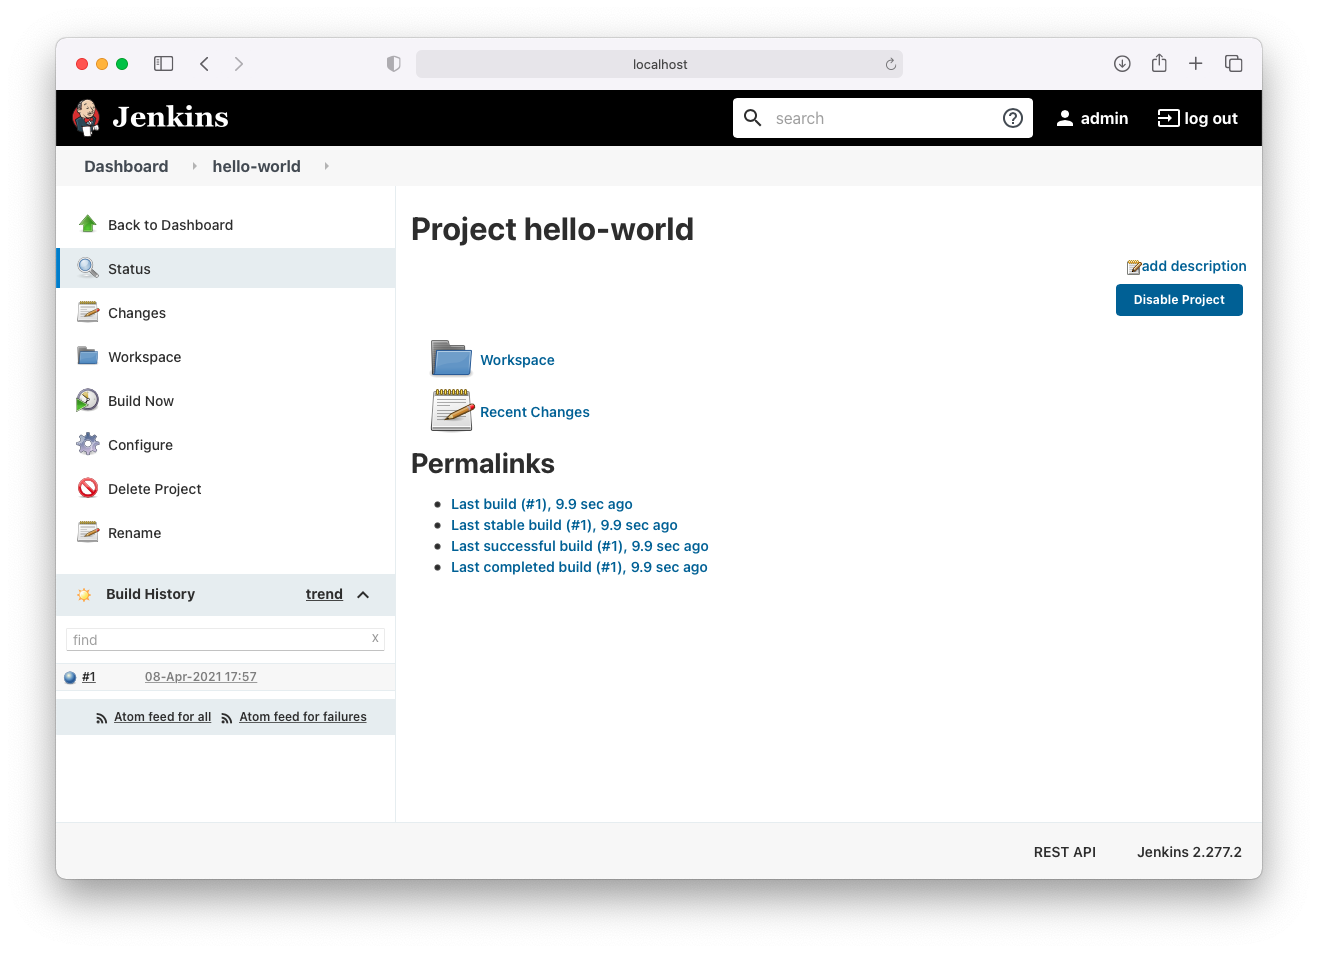
When Jenkins now loads the home page again, you will only see the smith agent. We now want to run our hello-world job from the previous post, and see that it will execute inside the smith agent.
- Click on the hello-world job from the list.
- Click Build Now on the left hand side.
- After a few moments the build job will appear in the build history.
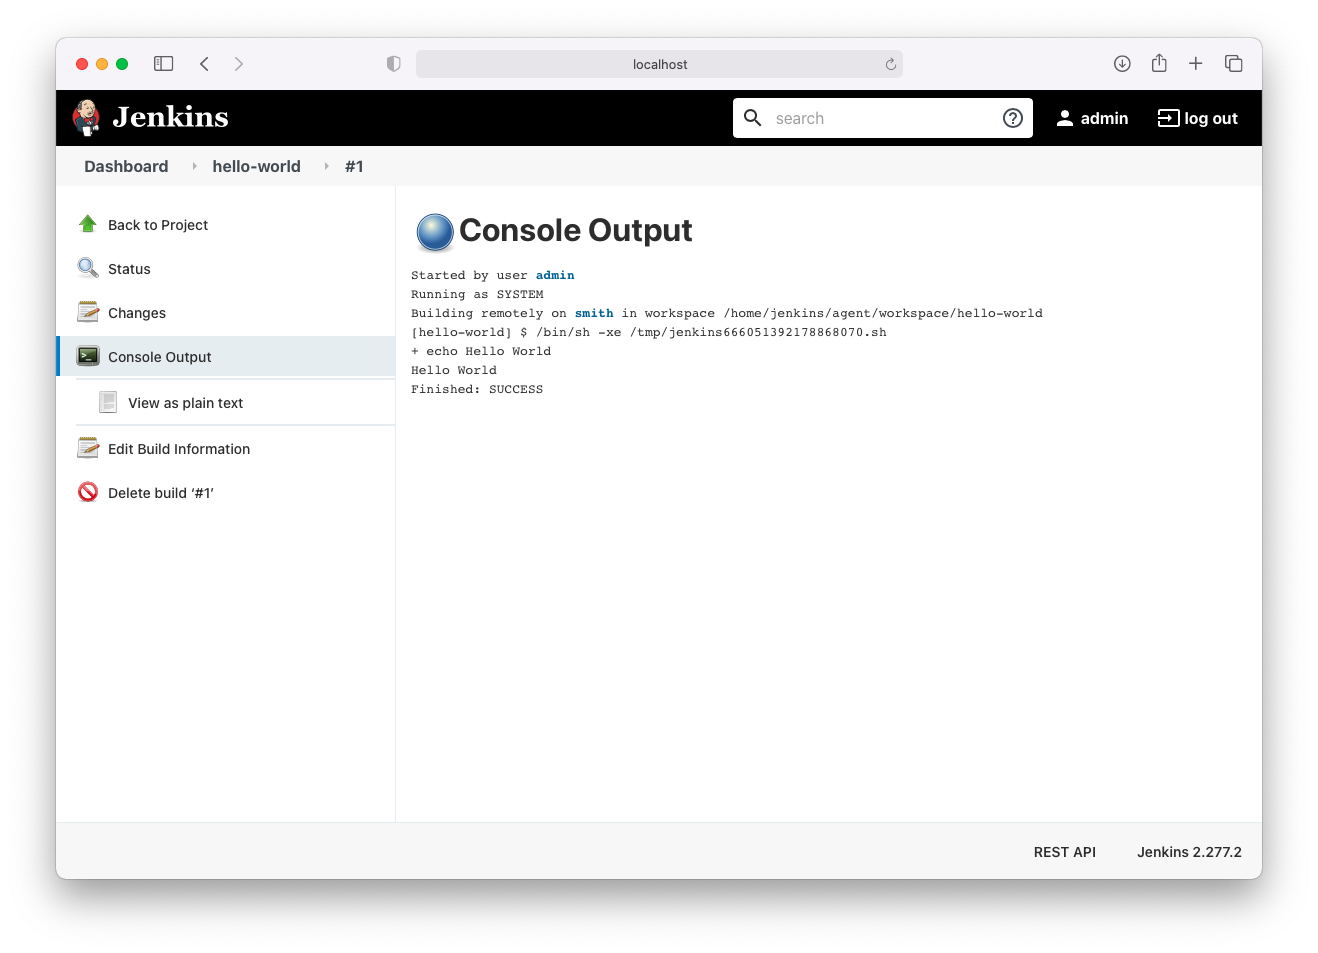
- Click on the blue ball, and see the “Hello World” output again.
What’s next
If you are adventurous, then the next steps would be:
- Define your own Jenkins agent in a Dockerfile, and run that.
- For example, get a Go or Node runtime inside it.
- Use something like
ngrokto expose your installation back to GitHub, to get GitHub Events.
Summary
This was a quick overview for getting a Jenkins agent connected to the Jenkins Controller application.