Setting up a VS Code Dev Container
Mar 21, 2021 · 7 min readLast week my team was tasked with picking up a project that I had last worked on 4 years ago. The deadline was tight, and we had a week to complete it. It was written in PHP, a language I’d barely written in the last 3 years. Obviously a lot has changed in 4 years (both in the language, setup, and the team I work in). I am the only engineer in my team now who knows PHP.
My first reaction was to get a working environment that I could use, and then share with my team. OK, maybe that wasn’t my first reaction 😅.
This post outlines how to setup a VS Code Dev Container, so your team can share the same development environment.
Why use a Dev Container?
I am not a fan of the “Works on my machine” mentality. I’ve blogged about this before. Engineers need to work in a consistent environment for their project. Ideally this would be closely aligned to the environment you ultimately ship to, i.e. Production.
We don’t want engineers wasting time on maintaining language versions, or OS libraries, or anything that slows them down. We want that burden to be taken away from them, or at least shared amongst the team. If you’re in a team that works on multiple projects, keeping everything in sync will become a burden.
Dev Containers provide the perfect solution in VS Code. With just a few files, you can configure VS Code to have a consistent environment (including plugins) for all your team.
Setting up a Dev Container
As a pre-requisite, you will need the “Remote - Containers” extension from Microsoft.
To setup a Dev Container environment, you have two options:
- Manually write the files required.
- Get VS Code to take you through the configuration screen and create the boilerplate files for you.
For your first attempt, I’d recommend option 2. Irrelevant of the option you pick, make sure you commit the .devcontainer folder to your version control system.
Manually
You will require two files (which we go over in more depth later in the post):
- A
Dockerfiledefining your environment. If you’re new to Docker, you can read this, or the official documentation. The definition is whatever you need it to be, with no special requirements for VS Code. For example, you could base it onnode:latestand add some extra packages if you wish. - A
devcontainer.json. This helps configure the VS Code environment, for example naming the environment.
Using the configuration screen
Open your project in VS Code, and run the Command Palette (On the mac this is on the “View” menu or shift+command+p). This will allow us to Type “Remote Containers” and get a list of options.
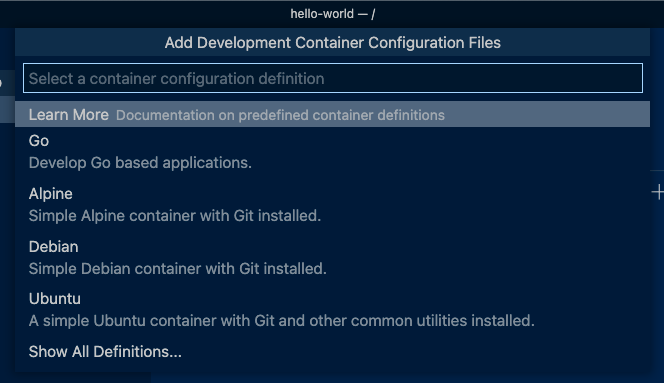
We want to pick “Add Development Container Configuration Files…”

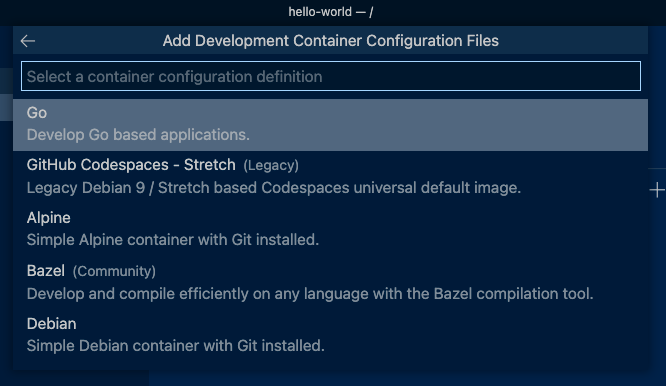
This will give us some standard Linux OS options, or you can select “Show All Definitions…” to get a more specific configuration, such as Go, Java, Node.js, Python, PHP etc. There are many options, so select the one that closely aligns to what you want.

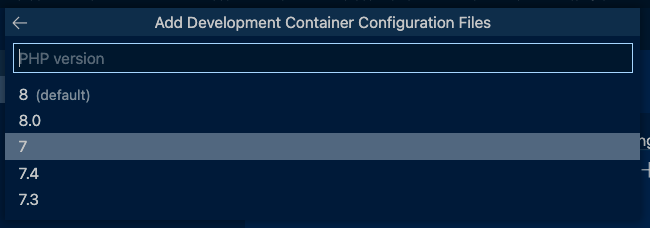
For my project, I needed PHP, but obviously you pick what you require. In the PHP setup, it then asked me what PHP version I wanted, and if I wanted Node.js installing too. I selected PHP 7, and to install Node.js.


Once you have finished selecting your options, VS Code will open the devcontainer.json file, ready to edit.
The Dockerfile
The Dockerfile is dropped into the .devcontainer folder within your project. If you have used the VS Code configuration screen, you’re likely to be using a base image provided by Microsoft.
They have done a great job of annotating the Dockerfile with touch points you can override.
You really are free to do whatever is required here. I simply added the following:
# Install additional OS packages.
RUN apt-get update && export DEBIAN_FRONTEND=noninteractive \
  && apt-get -y install --no-install-recommends \
  vim git libzip-dev unzip fzf software-properties-common

# Install PHP modules
RUN docker-php-ext-install zip

# Install gh
RUN  apt-key adv --keyserver hkp://keyserver.ubuntu.com:80 --recv-key C99B11DEB97541F0 && \
  apt-add-repository -u https://cli.github.com/packages && \
  apt update && \
  apt install gh
This is just to show an example, clearly your packages and dependencies are likely to be different.
The devcontainer.json file
This settings file let’s you configure VS Code and the way the container runs. It’s named devcontainer.json and is also dropped into the .devcontainer folder in your project. For comprehensive documentation on the structure and values, please refer to the official docs.
For completeness, this is what I’ve addded:
{
  "name": "my-simple-project",
  "build": {
    "dockerfile": "Dockerfile",
    "args": {
      "VARIANT": "7",
      "INSTALL_NODE": "true",
      "NODE_VERSION": "lts/*"
    }
  },
  "containerEnv": {
    "GITHUB_TOKEN": "${localEnv:GITHUB_TOKEN}",
    "GITHUB_USER": "${localEnv:GITHUB_USER}"
  },
  "runArgs": ["--name=my-simple-project"],
  "settings": {
    "terminal.integrated.shell.linux": "/bin/zsh",
    "php.validate.executablePath": "/usr/local/bin/php",
    "editor.tabSize": 4
  },
  "extensions": [
    "bmewburn.vscode-intelephense-client",
    "davidanson.vscode-markdownlint",
    "dbaeumer.vscode-eslint",
    "esbenp.prettier-vscode",
    "felixfbecker.php-debug",
    "ikappas.phpcs",
    "ms-azuretools.vscode-docker",
    "timonwong.shellcheck",
    "tyriar.sort-lines"
  ]
}
Some key call outs:
- The
buildsection allows us to pass arguments to the Docker build process, making this really flexible. containerEnvallows us to share environment variables from the host machine into the container.runArgsare passed to the Dockerruncommand. Here, we have named the container, so it’s slightly easier toexecinto it, outside of VS Code, should we want to.settingsallows us to define consistent VS Code settings for the project.extensionsallows your team to agree on plugins required for the project.
Dotfiles
Everything discussed so far brings project alignment for the teams working on it. That’s great news, but engineers also like to be individuals. For example, to be productive, I want my shell aliases, my exports, my functions, my prompt, my oh-my-zsh plugins etc.
After a bit of searching I found that you can define where your dotfiles are stored and VS Code will install them for you. There are three settings you can set, or override.
- Where your dotfiles are (
dotfiles.repository). - Where they should be cloned to in the Docker container (
dotfiles.targetPath). - How to install them (
dotfiles.installCommand).
Luckily for me, my dotfiles are in GitHub, and you can install them via an install.sh script, which turns out to be the default in VS Code.
Once you configure these options, you will get your dotfile experience in the VS Code container. This, for me, is the knock out feature that tips this solution over the edge. Consistency and individuality in the right places. Excellent.
Load the project
Having said all of the above, you can now load your project in VS Code.
There are two ways of doing this:
- Load VS Code, and it should ask you to re-open the project in a container, if it finds the
.devcontainerfolder. - If not, you can open the Command Palette, and run “Remote-Containers: Rebuild and Reopen in Container”.
The first time you do this, it may take a little while as it needs to build the Docker image. After the first load, each time you open the project, it should be much quicker (Unless you change the Dockerfile).
You are now using the Dev Container in VS Code. When you open the terminal, you are inside the container. Plugins are running inside the container too.
Conclusion
Much like I was sold on Vagrant about 8 years ago, I’m now completely sold on VS Code Dev Containers. It feels natural, and more light weight than Vagrant in some ways. The dotfiles aspect was pure polish for me. What a great feature, and well implemented too. For folks who like control over their host machine, this makes for a cleaner dev experience too, as all configuration and setup is inside a container. And of course, it is project scoped.
Why don’t you take some time to setup a Dev Container on your current project, and see if it helps you out?