Terraform knowledge to get you through the day
Apr 11, 2021 · 12 min readAs part of the “Getting through the day” series, this post is going to provide basic Terraform knowledge. We are going to setup a Terraform project that allows you to manage your repos in GitHub.
I didn’t want to assume that you had an AWS, Azure, or Google Cloud account, but a GitHub account seemed more realistic.
This post assumes that you have installed Terraform on your system.
CLI
Now that you have Terraform installed, you should be able to run terraform in your terminal. For this tutorial I am running the following version:
❯ terraform version
Terraform v0.14.10
Providers
Terraform Providers are like extension packs to allow you to integrate with third party vendors. There is a registry you can view in order to pick the provider you need for your project. As you would expect, all the main cloud providers are in there.
For this tutorial, we are going to use the GitHub provider.
So let’s go ahead and create a folder, so we can start to add some Terraform code.
mkdir tf-github-admin
In this folder, we want to create a file called provider.tf and define the GitHub provider. Let’s create the file with the following content:
provider "github" {
  token = var.github_token
  owner = var.github_org
}
Here you can see the provider keyword with the value of github. Inside this resource block, we are defining two identifiers (left hand side), and their values come from two variables (right hand side). More on variables later.
If you now run terraform init, you will see that Terraform will download the necessary provider code and present the following output:
❯ terraform init

Initializing the backend...

Initializing provider plugins...
- Finding latest version of hashicorp/github...
- Installing hashicorp/github v4.6.0...
- Installed hashicorp/github v4.6.0 (signed by HashiCorp)

Terraform has created a lock file .terraform.lock.hcl to record the provider
selections it made above. Include this file in your version control repository
so that Terraform can guarantee to make the same selections by default when
you run "terraform init" in the future.

Terraform has been successfully initialized!

You may now begin working with Terraform. Try running "terraform plan" to see
any changes that are required for your infrastructure. All Terraform commands
should now work.

If you ever set or change modules or backend configuration for Terraform,
rerun this command to reinitialize your working directory. If you forget, other
commands will detect it and remind you to do so if necessary.
I’m assuming you will commit this code to a version control repo, so follow the advice of committing the .terraform.lock.hcl file.
At this point, you should have the following files and folders:
❯ ls -1a
.
..
.terraform
.terraform.lock.hcl
provider.tf
If you now run terraform plan as it said in the output from init, you should see a response of No changes. Infrastructure is up-to-date.
Let’s start to define some variables.
Variables
Variable blocks allow you to define a variable that can be used within your code. Let’s create a vars.tf file with the following configuration:
variable "github_token" {
  type        = string
  description = "The access token to GitHub"
}

variable "github_org" {
  type        = string
  description = "The GitHub organisation"
  default     = "benmatselby" # You should change this to your username!
}

variable "github_repos" {
  type        = map
  description = "All our repos we want to manage using Terraform"
  default = {
    tfgithubadmin = {
      "name" : "tf-github-admin",
      "description" : "The Terraform configuration to manage GitHub repos",
      "topics" : ["terraform", "automation"],
      "archived": false
    },
  }
}
The above configuration is defining three variables:
github_token- This is the Personal Access Token (PAT) to auth you into GitHub.github_org- This is the owner of the repos, it can either be an organisation (e.g. github), or a user (e.g. benmatselby). Be sure to change this to your GitHub account.github_repos- This is a slightly more complicated variable. This is a map variable type. It has the configuration for all the repos we want to manage.
You can see that we are defining the type, description, and default attributes. None of these attributes need to be defined, you can define a variable with an empty block. However, try and ensure that you clearly describe the variable in the description field, it will help you in the future.
Now we have the variables we need, let’s start to define the resource blocks to manage the GitHub repos.
Resource Blocks
The aim of this tutorial is to have the ability to manage GitHub repos via Terraform, and control the settings via the github_repos variable defined above. So we now need to define the resource block that can iterate over the github_repos variable and communicate with GitHub.
Let’s create a file called repos.tf and put the following content in:
resource "github_repository" "repos" {
  for_each = var.github_repos

  name        = each.value["name"]
  description = each.value["description"]

  archived = each.value["archived"]

  // Settings
  visibility           = "private"
  has_downloads        = true
  has_issues           = true
  has_wiki             = true
  vulnerability_alerts = true

  // Merge settings
  allow_merge_commit     = true
  allow_squash_merge     = false
  allow_rebase_merge     = false
  delete_branch_on_merge = true

  // Topics
  topics = each.value["topics"]
}
Let’s break this resource block down a little bit.
resource "github_repository" "repos" {

}
This defines a resource of type github_repository with a name of repos.
- The
resourceis a language construct. - The
github_repositorytype comes from thegithubprovider we defined earlier. - Lastly,
reposis the name we have given to the resource. We can reference this name elsewhere in our codebase.
Next up, we should talk about the control statement:
  for_each = var.github_repos

  name        = each.value["name"]
I don’t know why, but I struggled with this when I first started using Terraform. Maybe it’s the lack of brackets? The first line is creating a loop and it’s using the github_repos variable we defined in vars.tf.
You can then see that the name identifier has a value of each.value["name"]. So based on our variables, the first iteration of the loop, name will equal tf-github-admin.
The other identifiers defined in the resource block are made available by the github provider. If you use VS Code, I recommend you install the HashiCorp Terraform plugin, so you get some code completion features. In fact, any editor that handles the Terraform Language Server will provide the same functionality. Having code completion will make learning this stuff a lot easier in my opinion.
Right, now we have the main components defined, let’s try and run this.
Running this thing
There are two commands we want to touch on here: plan and apply.
Plan
The plan command will explain what Terraform intends to do when you apply it. Let’s go ahead now and run terraform plan in the folder where your code is:
❯ terraform plan
var.github_token
  The access token to GitHub

  Enter a value: your-pat

An execution plan has been generated and is shown below.
Resource actions are indicated with the following symbols:
  + create

Terraform will perform the following actions:

  # github_repository.repos["tfgithubadmin"] will be created
  + resource "github_repository" "repos" {
      + allow_merge_commit     = true
      + allow_rebase_merge     = false
      + allow_squash_merge     = false
      + archived               = false
      + default_branch         = (known after apply)
      + delete_branch_on_merge = true
      + description            = "The Terraform configuration to manage GitHub repos"
      + etag                   = (known after apply)
      + full_name              = (known after apply)
      + git_clone_url          = (known after apply)
      + has_downloads          = true
      + has_issues             = true
      + has_wiki               = true
      + html_url               = (known after apply)
      + http_clone_url         = (known after apply)
      + id                     = (known after apply)
      + name                   = "tf-github-admin"
      + node_id                = (known after apply)
      + private                = (known after apply)
      + repo_id                = (known after apply)
      + ssh_clone_url          = (known after apply)
      + svn_url                = (known after apply)
      + topics                 = [
          + "automation",
          + "terraform",
        ]
      + visibility             = "private"
      + vulnerability_alerts   = true
    }

Plan: 1 to add, 0 to change, 0 to destroy.

------------------------------------------------------------------------

Note: You didn't specify an "-out" parameter to save this plan, so Terraform
can't guarantee that exactly these actions will be performed if
"terraform apply" is subsequently run.
There are three bits I want to cover here:
var.github_token- We defined a variable invars.tfcalledgithub_tokenthat did not have a default value. Therefore theterraform plancommand is going to ask you what the value is. Luckily, we are running this from a terminal so we can provide the value. If you want to run this in an automation server, then you can runterraform plan --var github_token=your-token. This will stop the pause, waiting for input.- The plan - You can then see a “diff” of what will happen when we run
apply. In our output you can see everything is a+because we are creating the repo for the first time. - The note - At the bottom of the output you can see it’s talking about guaranteeing the actions. You can produce a plan, save it to a file, and execute it later if you wish.
For more options run terraform plan --help to see what else you can do.
Apply
The apply command, by default, will also output a Plan, so you don’t necessarily have to run terraform plan each time.
Let’s run the following command:
❯ terraform apply
var.github_token
  The access token to GitHub

  Enter a value: your-pat

An execution plan has been generated and is shown below.
Resource actions are indicated with the following symbols:
  + create

Terraform will perform the following actions:

  # github_repository.repos["tfgithubadmin"] will be created
  + resource "github_repository" "repos" {
      + allow_merge_commit     = true
      + allow_rebase_merge     = false
      + allow_squash_merge     = false
      + archived               = false
      + default_branch         = (known after apply)
      + delete_branch_on_merge = true
      + description            = "The Terraform configuration to manage GitHub repos"
      + etag                   = (known after apply)
      + full_name              = (known after apply)
      + git_clone_url          = (known after apply)
      + has_downloads          = true
      + has_issues             = true
      + has_wiki               = true
      + html_url               = (known after apply)
      + http_clone_url         = (known after apply)
      + id                     = (known after apply)
      + name                   = "tf-github-admin"
      + node_id                = (known after apply)
      + private                = (known after apply)
      + repo_id                = (known after apply)
      + ssh_clone_url          = (known after apply)
      + svn_url                = (known after apply)
      + topics                 = [
          + "automation",
          + "terraform",
        ]
      + visibility             = "private"
      + vulnerability_alerts   = true
    }

Plan: 1 to add, 0 to change, 0 to destroy.

Do you want to perform these actions?
  Terraform will perform the actions described above.
  Only 'yes' will be accepted to approve.

  Enter a value:
You can see the first two sections are the same. Asking for the token, and providing the plan. However, now we are asked if we want to actually perform these actions.
Please type yes and press enter.
If the token is valid, and we have defined everything correctly, we should get the following output:
Do you want to perform these actions?
  Terraform will perform the actions described above.
  Only 'yes' will be accepted to approve.

  Enter a value: yes

github_repository.repos["tfgithubadmin"]: Creating...
github_repository.repos["tfgithubadmin"]: Creation complete after 9s [id=tf-github-admin]

Apply complete! Resources: 1 added, 0 changed, 0 destroyed.
If you now browse to your GitHub account, you should see a new repo called tf-github-admin.
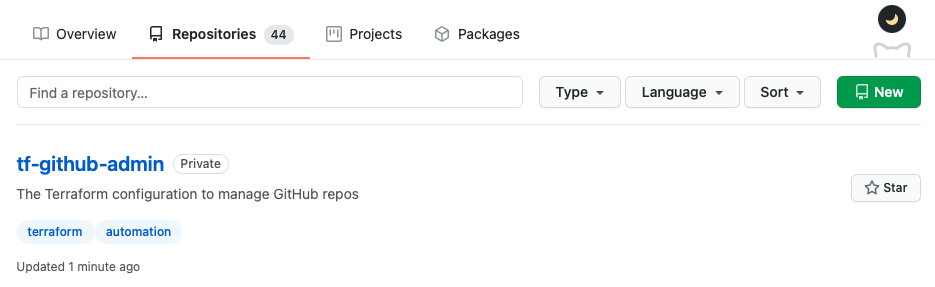
Well done, you just created a GitHub repo using Terraform.
For more options run terraform apply --help to see what else you can do.
Updating the configuration
Let’s see what files we now have:
❯ la -1a
.
..
.terraform
.terraform.lock.hcl
provider.tf
repos.tf
terraform.tfstate
vars.tf
You can now see that we have a terraform.tfstate file. To dive into state is too much for this post, so please read the official documentation. Just note, for the purposes of this post, that we are using “Local State”. State stores all the information about the resources we create. In this case, the state file is stored on your machine. If you lost this state file, you would need to import the state again to manage the repos. You can commit this file into your version control system for the purposes of this post.
With that being said, let’s see if we can now archive this repo, so we can see a change in action.
Open the vars.tf file and change "archived": false to "archived": true.
Now run terraform apply. You should see the following plan:
❯ terraform apply
var.github_token
  The access token to GitHub

  Enter a value: your-pat

github_repository.repos["tfgithubadmin"]: Refreshing state... [id=tf-github-admin]

An execution plan has been generated and is shown below.
Resource actions are indicated with the following symbols:
  ~ update in-place

Terraform will perform the following actions:

  # github_repository.repos["tfgithubadmin"] will be updated in-place
  ~ resource "github_repository" "repos" {
      ~ archived               = false -> true
        id                     = "tf-github-admin"
        name                   = "tf-github-admin"
      ~ vulnerability_alerts   = false -> true
        # (24 unchanged attributes hidden)
    }

Plan: 0 to add, 1 to change, 0 to destroy.

Do you want to perform these actions?
  Terraform will perform the actions described above.
  Only 'yes' will be accepted to approve.

  Enter a value:
You can see in the diff that it will now archive the repo. Go ahead and type yes and press enter.
This will now have archived your repo, and updated your local state.
Deleting the repo
The last step for this tutorial is to delete the repo. Open vars.tf and update the github_repos variable to be:
variable "github_repos" {
  type        = map
  description = "All our repos we want to manage using Terraform"
  default = {}
}
This essentially will tell Terraform to remove the repo.
Now run terraform apply. When prompted, answer yes and press enter to apply the changes.
github_repository.repos["tfgithubadmin"]: Destroying... [id=tf-github-admin]
github_repository.repos["tfgithubadmin"]: Destruction complete after 0s

Apply complete! Resources: 0 added, 0 changed, 1 destroyed.
Well done, you’ve now done the full lifecycle of resource management in Terraform: create, update, and delete.
Next level
If you want to take this to the next level, then you could:
- Get this running in your CI/CD tool of choice.
- You will need to understand Remote State.
- If you manage GitHub teams, you could define those teams in Terraform.
- Does your company have a standard for branch protection in GitHub? If so, you could define that in a central place.
Tidbits
- If you’re a mac user, I recommend you install Terraform via brew.
- If you need to be able to switch between versions easily, then take a look at tfenv.
- If you start to get a large Terraform project, you may want to look into Terragrunt.
- This is a good link if you want to know what the
.gitignorefile should look like for Terraform. - The code used in this post, is also a gist.
I hope this post has provided you with enough knowledge to be able to work on a Terraform project. If you have followed along, you also now have a codebase that can look after your GitHub repos.